
Onboard enterprise customers
Complete workflow for enabling SCIM provisioning and self-serve directory sync configuration for your enterprise customers
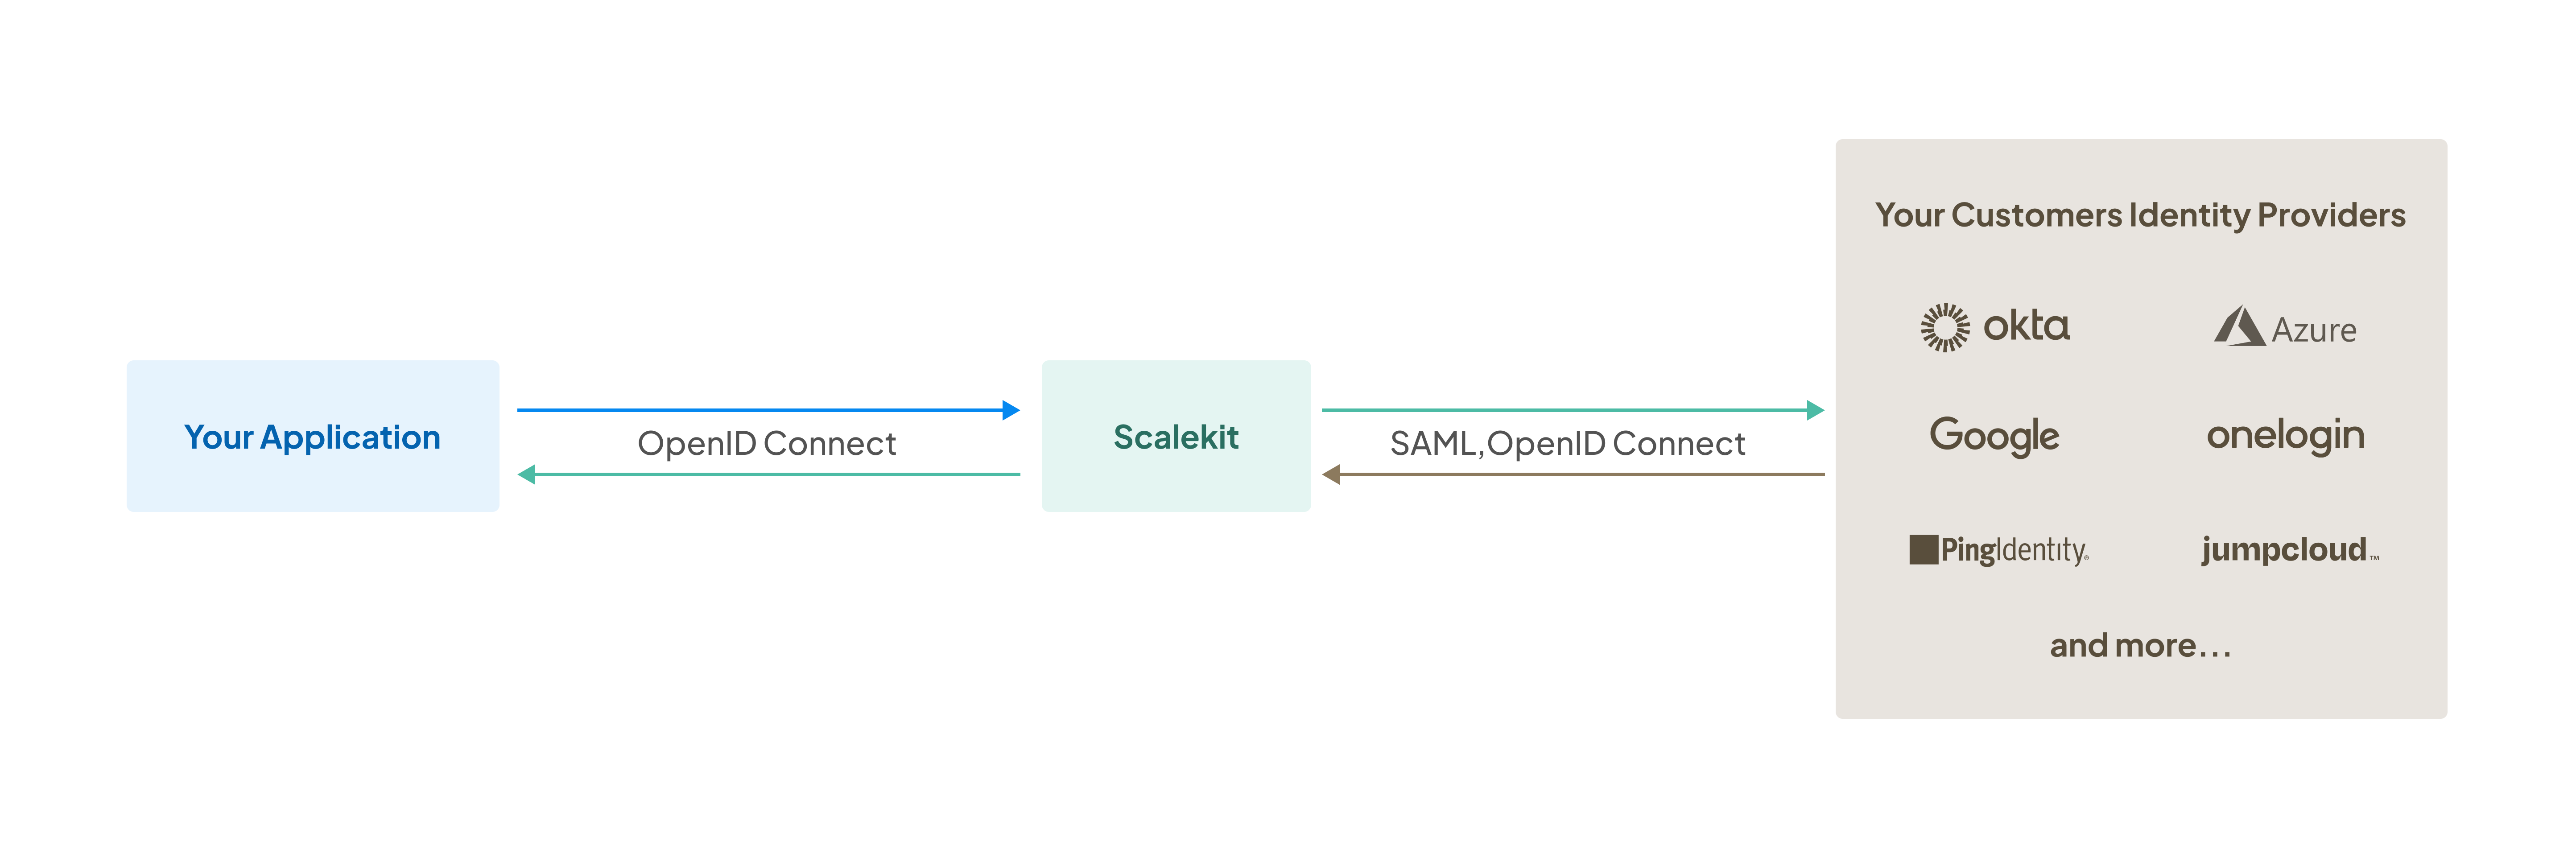
Enterprise provisioning with SCIM enables you to automatically create, update, and deactivate users in your application based on changes in your customers’ directory providers such as Okta, Microsoft Entra ID, or Google Workspace. This gives enterprise customers centralized user lifecycle management while reducing manual administration and access drift.
This guide walks you through the complete workflow for onboarding enterprise customers with SCIM provisioning. You’ll learn how to create organizations, provide admin portal access, enable directory sync, and verify that provisioning works end to end.
Before onboarding enterprise customers with provisioning, ensure you have completed the SCIM quickstart to set up basic directory sync in your application.
Table of contents
- Create organization
- Provide admin portal access
- Customer configures SCIM provisioning
- Verify provisioning and run test sync
-
Create organization
Create an organization in Scalekit to represent your enterprise customer:
- Log in to the Scalekit dashboard
- Navigate to Dashboard > Organizations
- Click Create Organization
- Enter the organization name and relevant details
- Save the organization
Each organization in Scalekit represents one of your enterprise customers and can have its own directory sync settings, SSO configuration, and domain associations.
-
Provide admin portal access
Give your customer’s IT administrator access to the self-serve admin portal to configure their directory and SCIM connection. Scalekit provides two integration methods:
Option 1: Share a no-code link Quick setup
Generate and share a link to the admin portal:
- Select the organization from Dashboard > Organizations
- Click Generate link in the organization overview
- Share the link with your customer’s IT admin via email, Slack, or your preferred channel
The link remains valid for 7 days and can be revoked anytime from the dashboard.
Link properties:
Property Details Expiration Links expire after 7 days Revocation Revoke links anytime from the dashboard Sharing Share via email, Slack, or any preferred channel Security Anyone with the link can view and update the organization’s connection settings The generated link follows this format:
Portal link example https://your-app.scalekit.dev/magicLink/2cbe56de-eec4-41d2-abed-90a5b82286c4_pOption 2: Embed the portal Seamless experience
Embed the admin portal directly in your application so customers can configure SCIM provisioning and SSO without leaving your interface. The portal link must be generated programmatically on each page load for security. Each generated link is single-use and expires after 1 minute, though once loaded, the session remains active for up to 6 hours.
npm install @scalekit-sdk/nodepip install scalekit-sdk-pythongo get -u github.com/scalekit-inc/scalekit-sdk-go/* Gradle users - add the following to your dependencies in build file */implementation "com.scalekit:scalekit-sdk-java:2.0.11"<!-- Maven users - add the following to your `pom.xml` --><dependency><groupId>com.scalekit</groupId><artifactId>scalekit-sdk-java</artifactId><version>2.0.11</version></dependency>Generate portal link
Use the Scalekit SDK to generate a unique, embeddable admin portal link for an organization. Call this API endpoint each time you render the page containing the iframe:
Express.js 6 collapsed linesimport { Scalekit } from '@scalekit-sdk/node';const scalekit = new Scalekit(process.env.SCALEKIT_ENVIRONMENT_URL,process.env.SCALEKIT_CLIENT_ID,process.env.SCALEKIT_CLIENT_SECRET,);async function generatePortalLink(organizationId) {const link = await scalekit.organization.generatePortalLink(organizationId);return link.location; // Use as iframe src}Flask 6 collapsed linesfrom scalekit import Scalekitimport osscalekit_client = Scalekit(environment_url=os.environ.get("SCALEKIT_ENVIRONMENT_URL"),client_id=os.environ.get("SCALEKIT_CLIENT_ID"),client_secret=os.environ.get("SCALEKIT_CLIENT_SECRET"))def generate_portal_link(organization_id):link = scalekit_client.organization.generate_portal_link(organization_id)return link.location # Use as iframe srcGin 10 collapsed linesimport ("context""os""github.com/scalekit/sdk-go")scalekitClient := scalekit.New(os.Getenv("SCALEKIT_ENVIRONMENT_URL"),os.Getenv("SCALEKIT_CLIENT_ID"),os.Getenv("SCALEKIT_CLIENT_SECRET"),)func generatePortalLink(organizationID string) (string, error) {ctx := context.Background()link, err := scalekitClient.Organization().GeneratePortalLink(ctx, organizationID)if err != nil {return "", err}return link.Location, nil // Use as iframe src}Spring Boot 8 collapsed linesimport com.scalekit.client.Scalekit;import com.scalekit.client.models.Link;import com.scalekit.client.models.Feature;import java.util.Arrays;Scalekit scalekitClient = new Scalekit(System.getenv("SCALEKIT_ENVIRONMENT_URL"),System.getenv("SCALEKIT_CLIENT_ID"),System.getenv("SCALEKIT_CLIENT_SECRET"));public String generatePortalLink(String organizationId) {Link portalLink = scalekitClient.organizations().generatePortalLink(organizationId, Arrays.asList(Feature.sso, Feature.dir_sync));return portalLink.getLocation(); // Use as iframe src}The API returns a JSON object with the portal link. Use the
locationproperty as the iframesrc:API response {"id": "8930509d-68cf-4e2c-8c6d-94d2b5e2db43","location": "https://random-subdomain.scalekit.dev/magicLink/8930509d-68cf-4e2c-8c6d-94d2b5e2db43","expireTime": "2024-10-03T13:35:50.563013Z"}Embed portal in iframe <iframesrc="https://random-subdomain.scalekit.dev/magicLink/8930509d-68cf-4e2c-8c6d-94d2b5e2db43"width="100%" height="600" frameborder="0" allow="clipboard-write"></iframe>Embed the portal in your application’s settings or admin section where customers manage authentication configuration.
Listen for UI events from the embedded portal to respond to configuration changes, such as when directory sync is enabled, provisioning is tested, or the session expires. See the Admin portal UI events reference for details on handling these events.
Configuration and session
Setting Requirement Redirect URI Add your application domain at Dashboard > Developers > API Configuration iframe attributes Include allow="clipboard-write"for copy-paste functionalityDimensions Minimum recommended height: 600px Link expiration Generated links expire after 1 minute if not loaded Session duration Portal session remains active for up to 6 hours once loaded Single-use Each generated link can only be used once to initialize a session -
Customer configures SCIM provisioning
After receiving admin portal access, your customer’s IT administrator:
- Opens the admin portal (via shared link or embedded iframe)
- Selects their directory integration (Okta, Microsoft Entra ID, Google Workspace, etc.)
- Follows the provider-specific SCIM or directory sync setup guide
- Enters the required configuration (SCIM endpoint URL, access token, and any required headers)
- Tests user provisioning from their directory to your application
- Activates the SCIM connection
Once configured, the directory sync or SCIM connection appears as active in your organization’s settings.
-
Verify provisioning and run test sync
After SCIM provisioning is configured, verify that user and group changes flow correctly from the customer’s directory into your application. This ensures your enterprise onboarding is reliable before rolling out broadly.
To verify provisioning:
- Create a test user in the customer’s directory and assign them to the appropriate groups or applications
- Confirm that the user appears in your application’s organization with the expected attributes (name, email, roles, and status)
- Update the user’s attributes or group memberships in the directory and verify that changes propagate to your application
- Deactivate or delete the test user in the directory and ensure their access is revoked in your application
Customize the admin portal
Match the admin portal to your brand identity. Configure branding at Dashboard > Settings > Branding:
| Option | Description |
|---|---|
| Logo | Upload your company logo (displayed in the portal header) |
| Accent color | Set the primary color to match your brand palette |
| Favicon | Provide a custom favicon for browser tabs |
For additional customization options including custom domains, see the Custom domain guide.